Showing posts with label Strength. Show all posts

Saturday, October 24, 2015

Mastering the Basic Fitness Moves - Part Three - Rows

Hello all! It has been quite a while since the last post. Lifetime Fitness Solutions has been developing a new website and it has been taking all my time. Fear not however, I haven't forgot our recent post about the basic fitness moves. In part 3 we will discuss rows. First let me say that there many different types of rows that can be performed that target different areas of the back, posterior shoulder, traps, and rhomboids. In this post I will cover some of the more common variations to give you a foundation for this exercise.

Rows are an upper body exercise that work multiple muscles including the lats, rhomboids, traps, posterior deltoids, biceps, erector spinae, teres major, and infraspinatus. Depending on what version of rows you do you can target some of these more specifically. Rows are a vital movement to learn as they are the go-to exercise for building size and strength in the back muscles. In addition to building the back musculature, rows also help strengthen the back which can have a positive effect on other lifts such as the bench press, deadlifts, and cleans.

Picture courtesy of chunkfitness.com

Depending on your specific situation you may want to vary the type of rows you do. For example if you have a history of herniated disks or other low back conditions, bent over rows may not be appropriate for you due to the positioning of the exercise and the resultant stresses on the lumbar spine, but you can still perform cable rows as well as seated rows on machine to get a similar effect. Lets look at the different types of rows more in depth. 

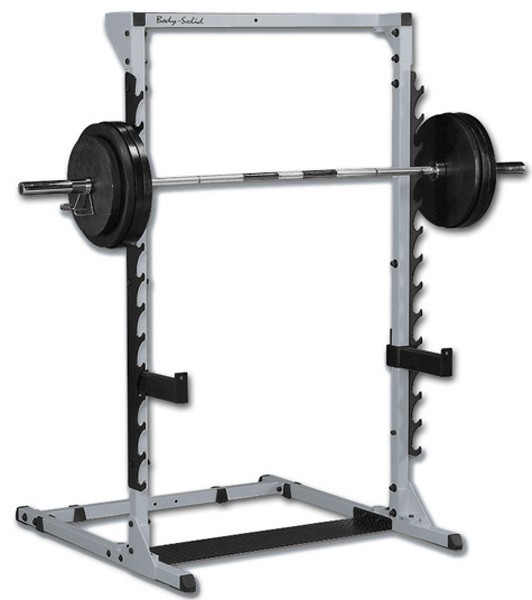
Bent Over Barbell Rows
Start with your feet about hip width apart. Your butt should be back, and your back should be flat with the head and chest slightly up. The knees are bent slightly to assist a flat back posture. If you have tight hamstrings, attaining a fully flat back posture will be difficult. If you feel your back start to round, do not bend as deeply at the hips. You can utilize an overhand grip where the palms are facing back, or underhand grip where the palms face forward. Both grips are about shoulder width apart. It has long been believed that an underhand grip utilizes and works the biceps more, however the evidence based research does not seem to support this. A wider than shoulder width overhand grip involves overall back musculature while slightly emphasizing rear deltoid, infraspinatus and teres minor involvement.

A common theme among rows is that you should pull with your elbows, and not your hands. When pulling with the hands you will utilize too much bicep and end up in a more than normal elbow flexed position. By pulling with the elbows you ensure that the back muscles are the ones doing the majority of the work. Pull the bar up to the ribs and squeeze the contraction at the end range of motion. With bent-over rows be sure to maintain a good posture throughout the movement. If your back starts to round discontinue the exercise as you will increase your risk of a low back injury. 


One-Arm Rows
One-arm rows are performed one side at a time. These are a great tool to use for normalizing strength on one side if you notice a weakness. To start a one-arm row take a bent posture with the non-working hand resting on a bench or other firm object. I see people perform these with no  hand support and feel that this increases the pressure on the lumbar spine so I do not recommend doing them this way. As with a standing barbell row you want your back to be in a flat posture with the head/neck held in neutral or slightly upright. Your stance should be staggered slightly with the back leg being on the same side as the working hand. Knees should be slightly bent to help maintain a flat back posture. If this set up is still too stressful on your low back, you can try this alternate posture

Drive the weight up by focusing on pulling with the elbow, not the hand. When pulling with the elbow, the weight will end up on next to the lower part of your ribs. If you pull with the hand there is too much bicep incorporated and the weight will end up more towards your chest or shoulder. Once the upper arm is about parallel to the ground, give a squeeze of the shoulder blade to increase the contraction. DO NOT let the trunk rotate during this movement. It should maintain a neutral position throughout the exercise. 


Cable Rows
Cable rows are a good option for people with low back pain issues. Because you are standing there is less pressure on the lumbar spine, but you still get the benefit of core activation by having to keep yourself in a stable and upright stance. 

Cable rows can be performed in a countless number of ways with various attachments and grips to influence certain muscles. The pictured example for instance, a cable low row with a v-attachment, will focus more of the exercise on the middle trapezius and rhomboids. 

To perform a cable row in standing, place the feet about hip width apart. Bend the knees slightly and keep the head and chest up with the core pulled in. Again, as with all row movements, pull with the elbows vs. the hands and bring the attachment to the rib cage/stomach area. Squeeze the shoulder blades together at the end range of the movement. 


Machine Rows
Machine rows are another good exercise for people with back issues. Machine rows are done in sitting and the chest is usually supported by a pad. This feature will keep pressure off of the lumbar spine. It's important to note that while the seated variation of the row is good for people without low back pathology, its use among healthy adults should be limited to being a supplemental training exercise, and not one of the main exercises used. People without low back pathology should instead focus on performing the bent over versions with good form in order to improve the stresses on the body and increase the functionality of the movement. 

The pictured exercise is just one type of seated row machine, but many versions exist. The setups of each machine will be similar however and this tutorial should be used as a loose guide when setting up your machine. 

Seat yourself firmly on the machine with the height of the seat such that the handles of the machine are slightly below shoulder level. The chest pad should contact you mid sternum. Notice in the pictures you can utilize a close grip (Pic 1) or a wide grip (Pic 2). The close grip variation will stimulate the lower lats to a greater degree and utilizes more bicep where as the wide grip will incorporate more trapezius, rhomboid, and posterior shoulder activation. There is not a better or worse than variation, and I often advise client to switch up their grips to develop the entire back overall. Your feet should be placed firmly on the floor and you should maintain a fully upright position. While the seat pads are there for support, DO NOT simply let your body slump into them. Hold yourself as upright as you can throughout the movement. 

Just like with all of the row movements we have covered here, the movement will be done with a pulling of the elbows, not the hands, and again we want to squeeze the shoulder blades at the end range of the motion. With the close grip version, keep the elbows tight to your side, whereas with the wide version the elbows will be flared out, ideally being parallel with the floor and perpendicular to your body. 

Narrow Grip Variation

Wide Grip Variation

Lat Pulldown

Lat pulldowns are not a type of row per se, however since we covered most of the back muscles here I would be remiss if I didn't cover them. The lat pulldown is used to focus primarily on the latissimus dorsi, the muscle that gives the back a V-shape. Lat pulldowns can be performed on machines or, if you do not have one available, you can perform them as pictured using a bench, lat bar, and cable machine. 

Grasp the bar with a wider than shoulder width grip. Sit fully upright, feet firmly on the floor. As with the back row movements, you want to pull the bar with the elbows, not the hands. Pull the bar to the top of the chest and squeeze the shoulder blades down and in at the bottom. 


We have covered many varieties of row in this installment, however this is NOT a comprehensive guide. Row are extremly versatile and there are countless ways to modify them for specifics goals. If you are new to weight training, the variations covered here should be your primary focus until you can perform them with proper form and cadence. Remember that you will get waht you put in when it comes to weight training. Keep checking back for part 4 of this series where we will cover bench presses. - Aaron

Monday, September 14, 2015

Mastering the Basic Fitness Moves - Part Two - Lunges

In part two of Mastering the Basics we are going to discuss another great lower body exercise; lunges. Lunges can be varied in so many ways to target so many lower body areas that if you are not doing them in your workout, you are doing yourself a great disservice.

Lunges are a lower body exercise that primarily works the glutes, hamstrings, and quadriceps. As I said, there are a number of variations that can be performed and depending on the type performed these muscles will be worked to varying degrees and some secondary muscles including the hip adductors and abductors will contribute as stabilizers. Adding to their versatility, lunges can be performed with almost every piece of resistance equipment in the gym including dumbbells, barbells, elastic bands, and kettle bells.


When doing lunges for the first time with a novice client, I always start with static lunges.  I also do not use weight initially as lunges require good balance and performing them with weight before you can master the core movement pattern can lead to people flinging dumbbells around as they struggle to stay upright.

Lunges can be performed statically or dynamically (AKA walking). A static lunge is one that is performed by stepping and then returning back to the starting position after each rep. Static lunges can be done forwards, backwards, or laterally (sideways). A walking lunge is one in which the person, rather than stepping back to the original starting position, propels themselves in the desired direction. Walking lunges can also be performed forwards, backwards, and laterally.  

FORWARD LUNGES
If this is the first time you are performing a lunge feel free to use a chair or some other stable surface to place your hand on. This will allow you to maintain balance and safety and also allow you to focus on the core movement pattern itself. To perform a static lunge you will start with your feet together. Take a LARGE step forward with one leg placing it firmly onto the ground. Poor step length is a common area where people mess up. Oftentimes the step is too short causing the knee to travel over the toes and placing too much stress on the patella which can be painful and possibly cause injury if performed like this consistently.

With the foot planted firmly, bend the front knee to lower the body to the ground. The back leg can be bent as you lower to the ground, but I instruct my clients to keep it as straight as possible in order to get a stretch on the hip flexor muscle group. Both head and chest should be as upright as possible though the entire movement; DO NOT allow your trunk to lean forward. This is another common mistake. The descent of the lunge should be controlled, do not go down so fast or so far that the back knee strikes the ground. This is dangerous and can cause injury.


After you have lowered yourself until the front thigh is parallel with the ground, push forcefully off of the front leg to propel yourself backward to the starting position. You can repeat another rep with the same leg, or you can alternate legs. I choose to have my clients alternate when performing the movement as it gives each leg a mini rest before it has to perform the next rep and allows more quality movements to be performed.  

BACKWARD LUNGES
A backward lunge, in my opinion, is much easier to perform statically versus its forward counterpart.  The upper body mechanics of the backward lunge remain the same, keeping the head and chest upright without leaning forward at the waist. Take a LARGE step backwards, large enough to ensure that the front knee remains behind the toes. In a backwards lunge as you step back, only the toes will make contact with the ground, after they do you will want to bend the front knee, again until the thigh is parallel with the ground. Once the front thigh reaches parallel you will use the front leg to force yourself forward and up to the starting position. Again you can perform one leg at a time, or alternate.


LATERAL LUNGES
Lateral lunges are mechanically different from both the forward and backward variations. You still want to keep the head and chest as upright as you can, but there will be some bend at the waist as this will be needed to keep weight balanced and perform the movement correctly.  Starting with the feet together you will begin with a LARGE side step landing with the foot placed firmly on the floor (Some people feel that you should turn the front foot out slightly as you step, however I feel that it is more effective for the intended targeted muscles to leave the from toes facing forwards). Once stable you are going to bend the forward knee and push your butt back, it will somewhat resemble a hybrid between a lunge and a squat, again keep the knee behind the toes on the working side. Once you have bent the knee so that the working side thigh is parallel to the ground, push off forcefully with the working side leg to return back to the starting position. As with the other two variations, you may do all on one leg first or alternate.


WALKING LUNGES
Walking lunges, no matter what direction they are performed in, are mechanically the same to begin with as their static counterparts. They only differ in that instead of returning to the starting position after each rep, you will propel yourself in the desired direction prior to the next rep. It is interesting to note that although forward lunges are more difficult statically, backward lunges are more difficult dynamically. Lateral lunges become increasingly difficult when performing the walking variation. When doing walking lunges you may need to take what I call a stopping step in between each rep, meaning that when you return to upright position you will place both feet on the floor to maintain balance. Once your balance in improved you can opt to perform one rep progressing directly into the next one without a stop step at full upright.

Lunges are so versatile and can be performed in so many different ways it would be impossible to write a fully comprehensive manual, but I did try to touch on the three most common variations. Lunges are a great way to build the quads and buttock muscles and to give the lower body a nice lean look. They also are effective at helping to normalize strength between legs if you have a noticeably weak side. Start easy with lunges and work your way up. Also be honest about whether or not you are ready to try more complex or weighted versions. Do not try to progress until you have mastered the basic movement pattern. Until next time. - Aaron

Thursday, August 27, 2015

Mastering the Basic Fitness Moves - Part One - Squats

When I begin training a new client, one of the first things I teach them is how to perform the basic movements of exercise with safe and effective technique. These movements are the basis of most exercises in the gym and once mastered a client can be progressed to more complex and strenuous exercises that will help them continue to progress with minimal risk of injuring themselves. 

In this series of posts I will introduce what I believe to be 6 of the most basic and important exercises to master and build your weight training program around. Squats, Lunges, Deadlifts, Bench Presses, Rows, and Planks. We will discuss what muscles these movements work, proper technique of each, and how to modify them if needed.  

Squats

We will begin with squats because as many seasoned weightlifters will tell you, the squat is the "king of exercises". Squats are an almost complete body exercise that works the gluteus maximus, quadriceps, hamstrings, abdomen, back, leg adductors and abductors. 

Picture courtesy of nobrainermuscle.com

Some may say that squats can be bad for your back or knees, but in my experience I find that if performed correctly, squats can be an effective strengthener of these areas and actually be used as a tool to limit injury to these areas. The key however is to make sure you are performing squats correctly. All too often I see people, mostly men, performing squats in the gym with improper technique and way too much weight, in which case you will greatly increase your risk of knee, hip, and back injuries.

When teaching a client squats for the first time, I often use the Smith machine. A Smith machine is a piece of equipment at the gym that consists of a barbell that travels on a fixed path that will only allow vertical movements. My rationale for using this equipment to begin with is simple: a free weight barbell squat requires a lot of stabilization from the body and many new, and even some experienced exercisers, are not sufficiently strong or balanced to begin this way. By using the smith machine I limit the extraneous stabilization needs of the squat which will allow my client to focus on the core movement pattern and utilize proper form. 

Picture courtesy of beaucoupfit.com

Once a client is able to perform the primary movement consistently with proper form, only then do I move them to a free weight version of the exercise. It is important to note that some people are able to perform consistent safe form with only a minimal amount of time on the smith machine, others, may require more time performing this variation. All that matters before progressing is that proper form is achieved. Do not rush into a free weight version of squats before you are ready as the risk of injury will be greatly increased.

Once the movement pattern has been mastered and you are ready to begin free weight squats you will want to do so inside of a weight rack. Weight racks vary greatly (see examples below), but the main purpose of them is to allow you to step under the barbell, set your feet and body safely, accept the weight onto your body, back away from the rack, and then perform the squat. When you are finished you step forward to the rack and set the weight back down safely. 


Before performing free weight squats there are a few safety concerns we need to address. If it is your first time performing a free weight squat I urge you to have a qualified professional with you. They can ensure proper form, help spot you if things get out of control, and give you instruction on how to improve. Also when performing a free weight squat for the first time keep your weights low and focus on your form. Only progress your weight when you can do the movement with perfect form and light weight.

You are now ready to squat! Step under the weight and place it across the top portion of your back, NEVER across the neck. Some people find it uncomfortable to have a bar sitting across their back. Many gyms provide padding that you can put on the bar for comfort. Others opt for just a towel rolled around the bar. Whatever you choose, if anything, be aware that it can give the bar a slight unbalanced feeling and this will affect your lift. Place your hands wider than the width of your shoulders and grip the bar firmly. With the weight properly seated on your upper back/shoulders and a tight grip, push upwards to lift the weight off the rack. Be sure to keep your core contracted. To do this you want to suck your stomach in as though you are trying to pull your bellybutton in towards your spine. This will help stabilize your back and reduce risk of injury.

Back away from the rack just enough to allow you to descend unobstructed. Place you feet shoulder width apart and slightly toed outwards to about 45 degrees. When you descend into a squat you want to push your butt backwards as though you are trying to sit in a chair that is not there. You never want to go straight down as this will cause too much forward lean and stress on the back. Keep your head and torso upright, make sure your weight is focused into your heels, and that your knees sit equal to or just behind your toes. They should never travel forward of the toes as this can cause knee pain and injury. Be sure to breathe in as you descend into the squat.  

The ideal squat should go low enough that your thighs reach parallel with the floor meaning your butt will be just below parallel. There are many other variations that call for deeper squatting technique but these should be reserved only for experienced lifters who know how to perform them safely. Most people will be able to descend to parallel, however if you have a history of knee problems, or feel that you cannot get to parallel safely, go to just above parallel. 


Once you reach parallel position, or just above, begin to stand immediately as you exhale through pursed lips. DO NOT sit in the bottom position, nor should you bounce the weight at the bottom. When standing you want to drive the weight upwards, with most of the pressure through your heels. As you ascend you want to push your hips forward and back under you to attain a fully upright position. DO NOT lock out your knees at the top. Once at the top check that you contract your core again before beginning the next rep.  

Squats are an important move to master and the form is a basis of many other variation of the exercise that will allow you to work more specific parts of the body. Spend the time and effort in the gym to master them and you won’t be sorry. Stay tuned for the next exercise we will explore in this series: LUNGES. Until next time – Aaron

**Disclaimer: This guide is not meant to be a comprehensive review of squatting, nor is it meant to substitute for the real life guidance of a qualified personal trainer. It is for educational purposes only.  People vary greatly and so do their needs. There may be extenuating circumstances of your health that have not been accounted for in this article and only a qualified trainer can assist you with this in a one-on-one situation. Please exercise caution and safety and consult with your physician before undertaking any type of weight training regimen**

Friday, August 7, 2015

LFS Product Review - Ab Carver Pro

If you have watched TV in the past decade or so you are more than likely familiar with the Perfect Push Up, the rotating handles that allow you to add variation to your push up routine and workouts. Perfect Fitness, co-founded by former US Navy SEAL Alden Mills,  has grown since then and added a number of other workout and fitness products to their company. Recently while on the elliptical I was searching for inspiration on my next blog post and thought "I should do another product review", then lo and behold an infomercial for the Ab Carver Pro struck inspiration.

First, a quick disclaimer - I have never used the Ab Carver Pro myself, but the purpose of these reviews is to see 1) Is what the company claims reasonable? and 2) Is it worth the money? With my level of fitness knowledge and background I don't need to try a product to come to a certain conclusion about those two points.

THE CLAIMS
The Ab Carver Pro claims it can give you ripped abs and sculpted arms all from one-little wheel and using it a few times a week. Stop and let that sink in for a moment, say it aloud a few times if you have to. Does that sound possible to you? I hate to be cliche, but if something sounds too good to be true, well you know how it goes, but I decided to continue anyway with the review to see if this is a piece of equipment worth having. 

When I got to the Ab Carver Pro website, I clicked on the video in which Mr. Mills describes the features of the product and how they affect the function and effectiveness of the item. I was pleasantly surprised that all the things he said were for the most part accurate, but more importantly they made sense. He said the point of the "kinetic engine" was to assist with the return portion of the roll out which is as he says could be very difficult for someone who has never used an ab wheel before. Same goes for the width of the wheel which again he says is the assist the beginner in that it offers more surface area to roll on vs. your basic ab wheel. In the video he also alludes to the handle shapes and the impact they have on triceps activation. He references a university study, but I have not been able to find it anywhere. I have an email in to the company, but at the time I published this post it has still gone unanswered. While I have my doubts about these claims, at least until I see the study, I will say that the handles certainly do look more comfortable and ergonomic than those on your standard ab wheels. Mostly however I do agree with the feature claims Mr. Mills makes in his video.

THE VERDICT
Will the Ab-Carver Pro give you a ripped six-pack and sculpted arms? Not likely, but it's possible. If you used it as a piece of equipment in your complete total-body workout regimen and followed a proper cardio and diet plan I'm sure you could see some results, but use of it by itself without a calorie restricted diet will most likely yield no results other than a stronger midsection.

My main issue with the Ab Carver Pro is the price. $39.99 is pricey for a piece of equipment that can only be used for one thing. Also, in my experience most people who buy these infomercial TV items get excited to use them initially and ultimately they just end up collecting dust in the corner next to the treadmill they now use as a clothes rack. If you are dead set on getting an Ab Carver Pro however, I do know that Perfect Fitness has a reputation for making high-quality products and I expect that this piece would last for a long time even with the most rigorous of use.

ALTERNATE EXERCISE
If you are a newbie to the ab wheel, or if you are looking for a good analog exercise without the expense, you CAN modify a regular ab wheel exercise to get the same benefit. Most gyms will have an ab wheel for customer use, or you can purchase one relatively cheap, and use some resistance bands to get the same effect. In this video you will see how to set up and perform a band-assisted ab-wheel roll out. The bands serve the same purpose as the Ab Carver Pro's "kinetic engine" in assisting the user with the return roll portion. This is a good way to start building strength until you are ready to try the roll out unassisted. I would say the one way I would modify this exercise for my clients is by having them perform it in front of a wall to act as a block in case they start to get too far away from themselves.

Overall I think IF you are going to use it, the Ab Carver Pro would be a quality piece of equipment to add to your collection, but if the price isn't right for you, you can still get the same benefits for half the cost with my recommended analog exercise. So give it a try and see what you think.

Until next time, best of health! -Aaron


Friday, July 20, 2012

Not all trainers are created equal........

I recently applied for a job with a company I never heard of and in their questioning of me they asked if I would reccomend their certification to a potential training candidate, to which I replied that I would not. Long story short I didn't get the job (maybe due to something I said), but it got me to thinking on my reason why I said I wouldn't recommend the NHE certification.

The personal training business is largely unregulated in the United States. Unlike doctors, or physical therapists, personal trainers do not have to have a license from the state to practice their craft. Truth is they don't even really need a certification. Any old person can call themselves a trainer and proceed to maim a client because they have no clue what they are doing. It really is scary when you think about it. Your are trusting your body to someone who may or may not be qualified enough to keep you safe. 

The easiest way to reduce the risk of working with unqualified trainers is by doing a little research. First, ask around. See if any of your friends or co-workers have worked with anyone in particular they like. If not you can always turn to online reviews. I highly recommend IDEA located here

So if you are wondering which certs rank tops let me tell you. 

1) NSCA 
The NSCA has three training certifications. The CPT is the personal training certificate and requires a high school diploma. The CSCS is made for individuals who wish to pursue sports training and conditioning and requires a BA/BS degree, and the newly created CSPS is certified to work with special populations defined as people who have "chronic and temporary health conditions". The CSPS has rigorous requirements including 250 practical hours in the applicants particular area of expertise.  Overall the NSCA is tops in my book. (http://www.nsca.com/Home/)

2) ACSM 
The ACSM is one of the oldest and most highly regarded personal training certifications in the country (by others, not me). Depending on the certification pre-requisites may include a high school diploma or a BS in Exercise Science, Exercise, Physiology, or Kinesiology. (http://acsm.org)

3 & 4) ACE & NASM
ACE and the NASM are both the same in that they do not require a diploma or GED. NASM fall behind ACE however because they are younger, they are for-profit, and their test is about $200.00 more than ACE. Plus ACE is much more well known. (http://www.acefitness.org/ & http://www.nasm.org/)

5) AFAA
AFAA is a three day workshop and then you study and take a test. There are ZERO prerequisites. Not even a CPR/AED requirement, which all the other four on this list require. However they are at least a respectable company and I have known plenty of good AFAA trainers. (http://www.afaa.com/)

This list is mostly subjective and based on my own beliefs, but it is important to note that a 2002 study done by the UCLA exercise physiology lab found that:

"...a bachelor's degree in the field of exercise science and possession of American College of Sports Medicine or the National Strength and Conditioning Association certifications as opposed to other certifications were strong predictors of a personal trainer's knowledge, whereas years of experience was not related to knowledge." They go onto suggest "that personal fitness trainers should have licensing requirements, such as a bachelor's degree in exercise science and certification by an organization whose criteria are extensive and widely accepted, before being allowed to practice their craft." READ MORE

I agree with the authors wholeheartedly, but until that day comes make sure to scrutinize your trainer just as you would your doctor or other health professional. Look for qualified trainers with the right credentials and do not be afraid to say something if you do not feel you are getting what you pay for. You should feel comfortable with your trainer and confident in his/her abilities. If you are not getting that vibe, than most likely it is not the right fit for you. -Aaron

Thursday, June 2, 2011

The Quick Ass-Kicker

I DON'T HAVE TIME. No combination of four words in the English language annoy me more. This is the most common excuse I hear as to why someone doesn't exercise. Well let me tell you something. If you have time to stuff another bite of fast food in your mouth; you have time to workout. I think there may be a misconception out there that a decent workout needs to be hours long, but this is not reality. If you give yourself 30 minutes a day you can make a significant change to your body. If you still want to tell me that you don't have time for that then stop reading my blog because your full of shit and you want to talk a big game, but not do anything about it.

The Quick Ass-Kicker
This workout is so named for 2 reasons....1) It is quick....2) It is an ass-kicker. For this workout to be effective you will need to fully invest yourself for the whole 30 minutes. You will have to push through and adhere strictly to the work/rest periods. If you can't do a specific exercise just do what you can and work up to it slowly. Doing something is better than nothing (always remember that). This program is meant to be run as a 4 exercise circuit. You will do all exercises for 1 minute a each without a rest between. After you have done 1 circuit, you will take a minute rest and then start again.  The four exercises plus the rest will take 5 minutes total. You will do the whole circuit 6 times totaling 30 minutes.

Getting Started
Here is what you will need to get going:
- 1 pen
- 1 pad of paper
- Some way of keeping time. Stopwatch, a smart phone with a clock, an actual clock, or something similar

When you do each exercise you will keep track of how many reps you can complete in the 1 minute time period. The goal is that each time you do this workout you will try to improve by doing more reps in the same 1 minute period. 

The Routine

Exercise 1 - Squat Thrusts
Start by standing with your hands at your side. Squat down and place your hands on the floor, just outside your feet. With your hands firmly placed on the floor, jump back with your feet so that you end up in a push up position. Keeping your core tight, quickly jump the feet back to the position between your hands. Return to the standing position. Repeat


My only gripe with this video is his sloppy form. Keep the core tight when you jump back so you do not sag. If this variation is too tough then walk out and back instead of jumping. If you want a greater challenge add a jump at the end to make it a true burpee.

Exercise 2 - Power Jacks
I must give credit where it is do. I got this move from Shaun T's Insanity series and I love it. It is TOTAL BODY. Start in standing with you hands by your side and core tight. Start the jumping jack as normal landing with your feet wider than shoulder width. As your feet hit the ground you are going to go into a squat and bring the hands down wide to your sides so that they are outside your legs (almost so that they . Push from the bottom of the squat forcefully to drive yourself into the up portion. The rest is like a regular jumping jack. As you come up your feet come together and you clap your hands overhead.


Her form is good, but she doesn't go down far enough for my liking.

Exercise 3 - Mountain Climbers
Starts in a basic push up position with your shoulders over your hands. Leaving one foot on the floor bring the other forcefully up to your chest. Quickly alternate so that as one foot is going back the other is coming forward. This almost looks like you are running with your hands on the ground.


Exercise 4 - V Push Ups
A little exercise of my own. It can be found on insanity as well, but I was doing these long before it cam out. Start in a push up position with one main difference. Bring your butt way into the air so that your body resembles an upside down v shape. Before you start rotate your hands inward slightly so that your fingers are pointing towards each other. Slowly bend your elbows and lower yourself to the ground making sure to keep your butt in the air and your elbows pointed out to the sides. You will not go down more than 4-6 inches. Push yourself back up and repeat. Sorry no video for this one.

So there you have it. 30 minutes of work. No excuses. Try this program 2-3 times per week with at least one days rest between.


Friday, January 21, 2011

Getting Strong vs. Getting Big vs. Getting Lean (Part 1 - Getting Strong)

Many novices are not aware that your goals, with regards to your weight training program, will dictate how you lift. This becomes painfully obvious when you go into the gym and see a newbie trying to curl way too much weight for way too many reps. I think, with men especially, there is a mentality that if a little is good, then more must be even better, but this isn't the case. More often than not this person will see insignificant gains, become frustrated, and quit lifting.

In my last post I talked about three principles that govern weight training. Specificity, overload, and progression. Of these three, specificity will be the star today. How you train will be SPECIFIC to your goals.

Many peoples goals can be broken down into three basic groups. Getting strong (strength), getting big (hypertrophy), and getting lean (endurance). Now granted, some people may have more than one of these goals in mind at the same time and that's fine. It is completely possible to advance more than one of these areas at once, so long as you realize that it will more than likely take some trail and error to do so.

GETTING STRONG
People often make the mistake of thinking that they can get strong by lifting the most weight possible for the most reps possible. Sorry. No. While this person will undoubtedly become stronger they will not attain their peak strength without training properly. Mirriam-Webster defines strength in about nine different ways, but the best way they define strength is "the power to resist a force". This definition in the true weight lifting sense is somewhat incorrect in that strength and power are different animals, but that is a different blog for a different day. So basically strength is the ability to resist a force, or in term of lifting weights it is the ability to generate a force. Not just any force, but what we call a maximal force. In the strength and conditioning world we measure a person's maximal force with something called a repetition (or rep) max test. There are many different variations of this test but most often we use the 1 rep max (1RM) test as the benchmark. As the name implies this test is the maximum amount of weight that a person can move, or the max force they can generate, for one repetition. The 1RM test is a true measure of a person's strength capability. When my client's goal is to get stronger I regularly test their 1RM at regular intervals. This way they can see the progress they're making in their program.

Keeping in mind that getting strong is about moving the most weight it is correct to draw the conclusion that when training for strength you should lift heavy weights. The part where most screw up is they attempt too many repetitions and they do not rest enough. If you ever get the chance to watch an Olympic weight lifter train you will notice that they will rarely, if ever, lift for more than 5 reps in a set. Many times their sets will be between 1-3 reps each. In addition, about 10% of their time is spent lifting, and the other 90% is spent resting. Rest periods when lifting for strength should ideally be between 2-5 minutes. Some people are of the mindset that resting for this long is counterproductive, but it is essential to allow for maximal recovery between sets. Maximal recovery means that maximal effort can be exerted in subsequent sets. This leads to more weight moved during a session and thus an overall more effective workout.

When starting a strength program the first step is testing your rep max. PLEASE PLEASE PLEASE always do this part with a professional! Testing your 1RM can be dangerous if you do not know what you are doing. If you go this website you will find a trainer locator:

http://www.nsca-lift.org/trainers/traineragree.asp

I cannot stress enough the importance of using a trainer to help you find your rep max. Allow me to stand on my soapbox for a minute and also say that your trainer should be a Certified Strength and Conditioning Specialist or CSCS. This certification is only available through the NSCA and is only available to persons with a college degree. I do not mean to offend other certifications or personal trainers, but CSCS devote their life to strength and conditioning and their knowledge is unequaled in this area.

Once you get your rep max you now have your benchmark. You can use this number to compare your subsequent lifts and track your progress. If your future RM goes up than you have obviously gained strength. Just as with all training endeavors it is critical to note that people differ in many ways and what works for A may not work for B. With that in mind the following program should work for most beginners:

Week 1: 3 sets, 5 reps, (60%, 70%, 80%)
Week 2: 3 sets, 4 reps, (70%, 70%, 80%)
Week 3: 3 sets, 3 reps, (70%, 80%, 90%)
Week 4: 3 sets, 3 reps, (80%, 90%, 100%)

This is meant to be done for one month. After that month you will test you rep max again and you should see an increase in your 1RM.

When attempting this program please keep these helpful tips in mind:

1) Eat enough to fuel your body. You can run a car without gas, and likewise you cant run your body without food. Eating enough is vital when lifting for strength. Most often people lifting for strength should expect to gain some weigh in the process and should be consuming around 17-19 calories/pound body weight. In addition make sure you are getting at least 1g protein per pound. (especially making sure to consume around 25g before your workout and 40-50 after)

2) Rest is essential! I applaud your effort to want to go all out everyday, but going all out will lead to burnout. You need to rest at least one day, but ideally 2, between these workouts. Also make sure you are sticking to the 2-5 minute rest period between sets. When lifting less weight you can rest less, but as you get into the 90% and 100% of your RM the 5 minute rest is important.

3) Lifting for strength according to this plan is for the "big" lifts like bench press, squats and deadlifts...not for curls. If you are interested in bigger arms to impress the ladies then read future posts for my hypertrophy plans. Trying to lift heavy weights with some lifts is just ridiculous and can lead to injury.

So there are the basics. After you have done this a while you may begin to plateau. If that is the case then hire a CSCS and they can hep you revamp your program to see more gains. Keep reading for Part 2-Getting Big. Until then, stay healthy my friends!